The day you’ve been waiting for has come – your home renovation is finally over! We’re pretty sure you’re all pumped up to properly move in, kick back and relax. But before you call in the packers to start hauling your belongings over, there’s a post-construction task that needs to be addressed first. And that’s cleaning up your apartment to make it move-in ready. A bit of elbow grease and some strong-arm techniques are required – but don’t fret, we’ve prepared a checklist to make the task run as smoothly and efficiently as possible.
Ready for operation clean-up? Let’s go.
1. Bring in the breeze
Rest assured, your interior designers will not leave your home in a mess. They will typically help to clear your apartment of major haulage, but take note that they’re not professional cleaners. No matter if yours is a major or minor overhaul, any type of renovation will inevitably leave an overwhelming amount of construction dirt and dust in its wake. The first thing you need to do is ventilate. Open every single window as well as cabinet door in your home, because the fine particles will find a way to sneak into every nook and cranny of your space. To prevent the sniffles, strap on a protective mask before you embark on operation post-renovation clean-up.
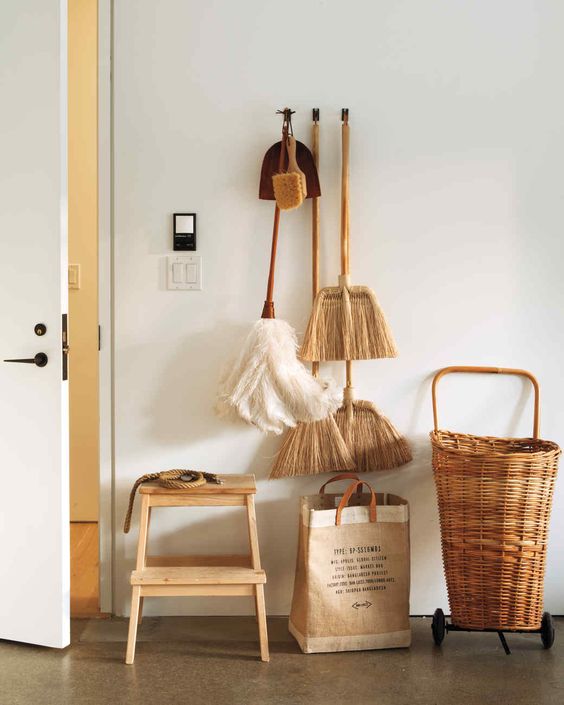
2. Tackle dirt with a dry clean
Before you go straight for the big wipe-down, do a dry clean and remove all visible dirt first by arming yourself with a broom or a vacuum cleaner. With hardwood floors especially, it’s important to remove as much dust as possible before you start mopping, as the fine grains of dust can scratch your precious brand-new floors. The same goes with wood furniture. Take time to vacuum using a soft-bristled attachment before wiping them with a soft cloth. Always start from the top – like shelves and countertops – slowly making your way down to the bottom cabinets and finally, the floors. As dust settles in and on practically every surface, don’t forget the inside of your wardrobes, light fixtures, even your windows and doors.
Image courtesy of Martha Stewart Living
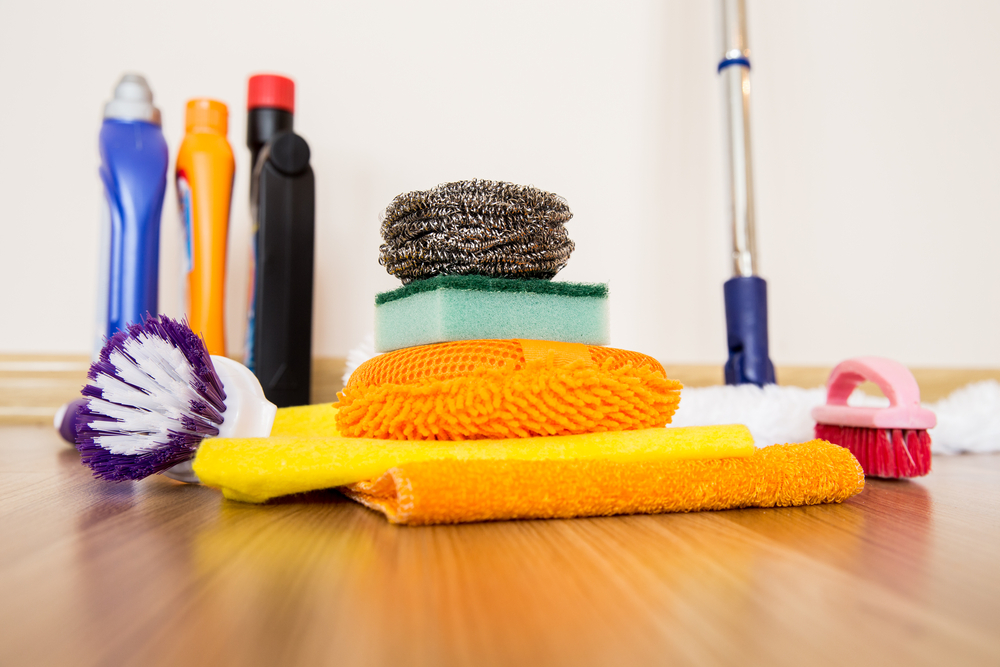
3. Mop down and wipe away
Now it’s time to take on the finer specks of dust with a wet cloth, a mop and some disinfectant. Follow the same method of starting from the top and making your way down. Use a damp cloth with a bit of cleaning liquid (avoid anything overly abrasive!) to give the surfaces in your apartment a good wipe down. Take note: don’t leave any surface untouched, even those that appear relatively clean. Places you shouldn’t miss out include shelves, the rungs of your window grilles, tops of doors, door knobs, and even walls. Leave the floors until you’ve cleaned everywhere else to avoid double work. Fine dust takes time to settle, so you might need to make your rounds again over the next couple of days. With perseverance, your home will be free of dust in no time at all!
Image courtesy of Marji McClure
4. Attack the stains
Be it fingerprint marks on your glossy laminates or cement smudges on tiles, stains are inevitable post-reno. There’s no reason for a panic attack. When it comes to the former, simply remove with a damp cloth soaked in gentle detergent. Wipe away repeatedly until what’s left is a perfectly gleaming surface. Cement stains need more and immediate attention. Use a combination of common household items like vinegar, cleaning towel and scouring pad to loosen, scrub and remove the cement away.